UEFI News and Commentary

Monday, July 29, 2013

Writing an IFR Assembler for UEFI - Part 2

This is part two of Writing the IFR Assembler for UEFI. This article discusses the IFR Assembler set up in Part 1. To set up the IFR Assembler, follow the instructions in Part 1.

This blog post will walk you through the basic parsing process of the IFR Assembler from the parsing of the Command Line to the parsing of individual forms.

Understanding the Parsing System


Normally, the IFR Assembler is given a .pl file from the command line to parse. The .pl file holds the information about the packages, form sets, forms, and everything that needs to be parsed by the Assembler. There are two types of places to put information for each of these items to be parsed. First, information that relates specifically to that item, like operands of a form, are put within parentheses right after the item. If there is information nested inside an item, like a form nested within a form set, the information is put into the curly braces after.

When parsing a .pl file, the IFR Assembler starts with the first item, which is usually the Package List, the item is parsed, then anything nested within is operated, which would be the Form Package. After the Form Package is parsed, everything nested in front of the Form Package is parsed, and this cycle goes on until the Assembler has parsed everything. When it has, the Assembler writes out the parsed information to the output file. The following two sections will serve as a basic walk through of how text on a command line is parsed and written to the output file.

Command Line Parsing

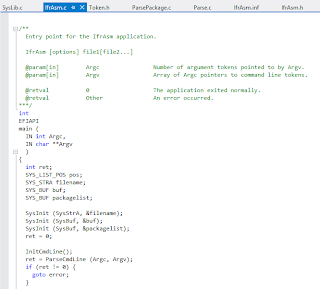
The IFR Assembler application is entered through the function main() in the program IfrAsm.c. One of the important jobs of main() is to translate information given to it from the command line so that it can be parsed by the IFR Assembler.
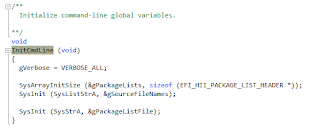


To begin parsing the command line, InitCmdLine() is called to initialize command line global variables.
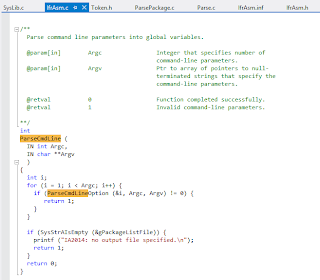


After the initialization is finished, main() calls ParseCmdLine(). ParseCmdLine() and ParseCmdLineOption() go through the command line and create an array of the actions and locations written into the command line.
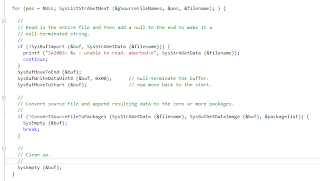


main() uses this array to get information from the locations. This information is then made into a source file.


Parsing Within Packages


The source file is sent to the function ConvertSourceFileToPackages(), which is within ParsePackage.c. This function, like the name suggests, converts the source files into packages. ConvertSourceFileToPackages() puts all the packages in to a package list which is sent down through ParsePackage.c to get parsed.


The package list is sent to ParsePackage(). This parses the contents of the packages and depending on the type of package found, a different parsing function is called. Currently, only form packages are recognized by the Assembler, and if the packages found are not form packages, an error is produced.


Form packages are sent to ParseFormPackages(). This function takes the form package and goes throught its contents. Normally, a Form Package carries Form Sets. Each set is sent to ParseForms() to be parsed further.
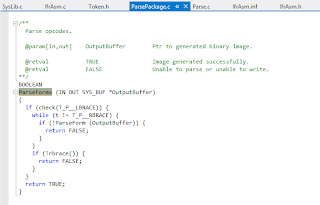


The contents of the Form Package are sent to ParseForms() which goes through the contents and parses each form set within the package.


ParseForm() is given a single form from ParseForms(), and it reads the op-codes that are held within the form. When ParseForm() reaches an opcode, it checks to see if the op-code can have any operands (This information on op-codes is found in Opcodes[] in Parse Package. If the op-code does, ParseForm() checks for a left parenthesis). If the operand requires an operand, the left parenthesis is required, otherwise, the left parenthesis is optional. If a left parenthesis is found, ParseForm() sends the operands within the parentheses to ParseOperand().
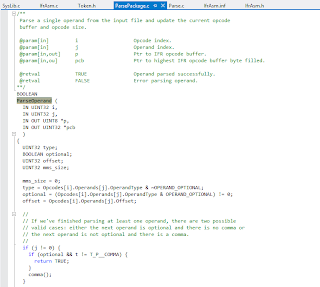


ParseOperand() decides what type of operand it was passed and tests to see if the operand type found matches the operand type expected. If the operand type found matches what is expected, ParseOperand()  decides which function to send the operand to. There are specific functions for each type of operand, like ParseUint8() or ParseExprOperand(). Each operand-specific function has a unique set of tasks that it performs in order to parse the operand properly.
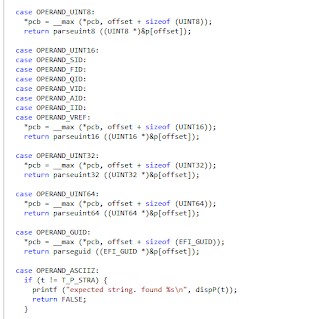


After the operands are all parsed, the form's information is returned back to ParseForm() in a buffer to be written to the output file. . When all the forms, lists, and packages have been parsed and written to the output file, the program returns back to main(). main() frees information and clears out any remaining information.


The table below gives the basic information of each parsing function discussed in this article, including its name, what item it parses, its location in the assembler, and which section of the UEFI Specification it refers.


When a test case like the one used in Part 1 is entered into the command line, this chain of parsing functions is what takes the commands on the command line, translates it, and writes it to the output file. In the next article, you will learn about token parsing in the IFR Assembler.

Wednesday, July 24, 2013

Writing an IFR Assembler for UEFI - Part 1

In this article, you will learn how to run SysLib and IFR Assembler in Visual Studio 2012.
This article assumes that you have Visual Studio 2012 and that you have built EDK2's NT32 platform in C:\sourcecode\edk2.
 
In order to make these steps work as expected, you must set up Visual Studios as instructed in the blog post here.
 

Set Up:


1. To find the SysLib code, you must use Subversion to download the files onto the computer using this link: https://svn.code.sf.net/p/syslibforuefi/code/trunk
 
2. Create a folder titled SysLib, then take all the downloaded files and put them into the SysLib folder. Keep the files organized in folders in the same way they are on the website.


3. Copy the SysLib folder you just created into the folder C:\sourcecode\edk2.


4. Open the folder C:\sourcecode\edk2\Nt32Pkg


5. Open Nt32Pkg.dsc in Visual Studio.


6. On about line 109 of Nt32Pkg.dsc, which is under the section "Generic Modules", write the following code:
SysLib|SysLib/Source/SysLib.inf


7. On about line 384 of Nt32Pkg.dsc, which is under the section "DXE Phases modules", write the following code: SysLib/Applications/IfrAsm/IfrAsm.inf


8. While downloading the files for SysLib, you should have downloaded some test cases. They are held in the folder C:\sourcecode\edk2\SysLib\Application\IfrAsm. Each one is a .pl file and is labeled 1 through 10. Select all the test cases.


9. Right click on the selected test cases and click on "Cut".


10. Open the folder C:\sourcecode\edk2\Build\NT32\DEBUG_VS2010x86\IA32.


11. Right click and select "Paste" to add all test cases to the folder.


 Running

12. Open Visual Studio 2012. Make sure that by this point, you have created EDK2's NT32 environment. If not, go set it up using these instructions.


13. Open your NT32 project.


14. Click on Build->Build Solution or press F7.


15. Wait for the program to finish building.


16. Once the build has finished, click on Debug->Start Debugging or press F5.


17. A window will appear, press the button that says "No".


18. Two or three windows will appear. Go to one of the GOP windows. Press "Enter" until Shell> _  appears at the bottom of the window.


19. Type f8: into the GOP window, then press "Enter".


20. When f8:\> _ appears at the bottom of the GOP window, enter the following text:
IfrAsm testcase8.pl -o testcase8.ifr


21. The opcodes used for testcase8.pl will be displayed in the GOP window. To run any of the other test cases, simply type in the text you typed in step 21, but replace testcase8 with the name of the test case you would like to run.


Test cases like the one used in the blog post are useful because the can be used to test different parts of the code to ensure that the code is being correctly parsed, read, and written. In the next post, the basic parsing organization of an IFR Assembler will be explained.

Wednesday, July 17, 2013

HOW-TO: Change an image using keyboard input

In this article, I will talk about changing an image to another in a series using keyboard input, like a basic sprite application.  This article assumes that you have already followed the instructions in this article in order to display your own image.

Source code for this project is on sourceforge, here.

The first thing about this project is that it requires several images.  It is a very simple way of cycling through sprites.  To work with these images, we will simply have an array containing each image's GUID.

The function that handles the image cycling is very simple.  All it does is wait for a keyboard stroke.  If it senses the up or down arrow, it will point to the next image in the given direction.


RotateUp() and RotateDown() are basically the same function.  They take in a pointer to the current position in the array, the index of that position, and the length of the array.  For this particular display, I did not want the images to loop back and start the cycle over again, and I wanted them to stop once the ends of the array were reached and not go past it.  To do that, I simply returned the original GUID that was passed in rather than a new one.  It would be a simple change to make the images cycle back around by using a mod operator.  If it is not at the end, the function will simply point to the next element in the array in the given direction.


The main function does a basic error check, displays the directions, and calls the function that deals with image cycling.