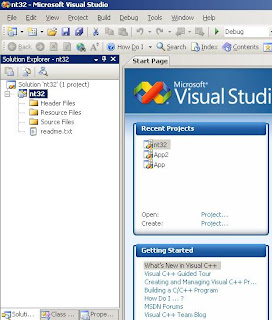
Since I'm working on a little research project of my own using UEFI applications, I thought I'd use the Windows-hosted UEFI (aka NT32) environment provided with the EDK. From previous experience, I know that the ability to debug applications using the Visual Studio environment speeds up my development time considerably. So I thought I'd share how I set up my environment. Then next time, I'll share how I set up for debugging.
This article assumes that you have Visual Studio 2008 installed and that the EDK has been downloaded to C:\EDK.
Create New Visual Studio Project
In this step, the goal is to set up Visual Studio so that it can build the Windows-hosted (NT32) UEFI environment. The build files for this project are located in C:\EDK\SAMPLE\PLATFORM\NT32.
1. Select File|New|Project.
2. Select the "General" project category and select "Makefile Project". Then enter the Name as "NT32". Then click "OK".
3. The Makefile Project Wizard will pop up. Click "Finish"
4. Your new project will appear in the Solution Explorer.
5. Select the NT32 project with the mouse. Select Project|Properties.
6. On the "NT32 Property Pages", change "Configuration" to "All Configurations".
7. Select "Build Command Line" and then select the ... on the right edge.
8. This will pop up a separate editor box. On three separate lines, enter the following text and click "OK".
cd /D c:\edk\sample\platform\nt32
set EDK_SOURCE=c:\edk
call build.bat
9. Now, for "Rebuild All Command Line" enter:
cd /D c:\edk\sample\platform\nt32
set EDK_SOURCE=c:\edk
call build.bat clean
call build.bat
10. Now, for "Clean Command Line" enter:
cd /D c:\edk\sample\platform\nt32
set EDK_SOURCE=c:\edk
call build.bat clean
11. Finally, for the last step, enter:
c:\edk\sample\platform\nt32\uefi\ia32\SecMain.exe
12. Select OK.
13. Edit Config.env, which is located in C:\EDK\Sample\Platform\NT32\Build, and change USE_VC8 = YES. By default, it is set to NO, which will build with Visual Studio 2003 and a large number of build errors.
Launching The Windows-Hosted Environment.
At this point, should be able to build by selecting Build|Build (or using F7). You can run the emulated environment by going to the command prompt and typing:
cd /d c:\edk\sample\platform\nt32\uefi\ia32
SecMain.exe
You will see (at least) two windows: the debug output console window and then the graphics output window. The graphics output window will show a fake logo, a progress bar and then boot into the built-in EFI Shell.
Conclusion
Well, that gets us to the first step. Next time we'll discuss how to set up the debugger and how to make your code debugger friendly.
UEFI News and Commentary
Subscribe to:
Post Comments (Atom)


8 comments:
That's cool, tim
i follow ur steps and success to build my EDK with VS2008.
i think this is really useful for a begginner like me, Thanks for share~
Kurt
hi tim
can u provide me sm architectural details and how UEFI works plz
hi tim
i am an engg student & i am doing a technical seminal on UEFI for my final sem so if u could plz help me.
i want to know the architecture and wirking of uefi
All right.
I managed to repeat these stepes.
But how could I use all this to write my own *.efi?
I want to compile my own code, but I habe to 'include' ALL directories by hand.
How that you've written could help me?
Thanks for answer if it is.
Hi Tim,
I have followed your steps and successfully build my EDKII with VS2008. I am able to build & run simple efi application using efi protocol libraries and services. But I am facing problem to include VS C library to my application. Could you help me on this. I am using .inf files for application.
Thanks,
Himdeep
Whats about x64 ?
Almost all are x64 now . It would be very nice to blog this for x64.
@Bodo, I know that Phoenix has WinHost as part of their SecureCore product that they sell commercially. It has several advances over what is present in TianoCore.
If I have time, perhaps I'll create the patch necessary to do it for Nt32Pkg on EDK2. Look for the article on getting VS2010 and EDK2
Hello Tim
I liked this tutorial.By the way can you help me in building the CorebootPkg from the EDK 2 in Debian' s Ubuntu 12.04.
Post a Comment